
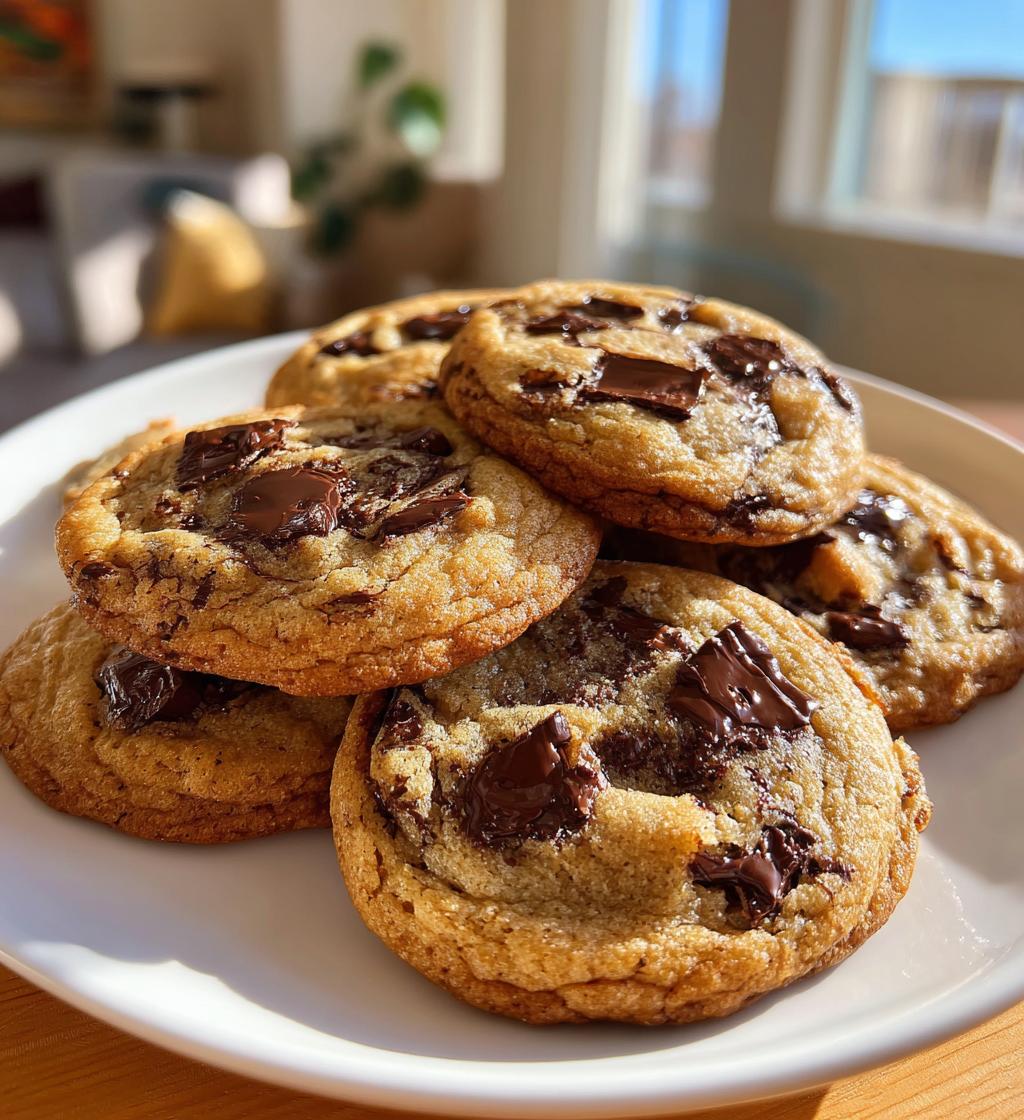
Oh my goodness, let me tell you about *milk cookies*! These delightful little treats are truly the epitome of comfort baking. The moment you take a bite, the rich, buttery flavor combined with those gooey chocolate chips just melts in your mouth. I whip up a batch of these whenever I’m hosting friends or just need a sweet pick-me-up after a long day. They’re so versatile, perfect for everything from cozy family gatherings to festive celebrations. Trust me, there’s something magical about the way they fill the room with the warm, inviting smell of freshly baked cookies—you can’t help but smile! Plus, they’re incredibly easy to make, so even if you’re not a seasoned baker, you’ll feel like a pro in no time. Seriously, get ready to impress everyone with these little gems that are destined to become your new favorite treat!
Ingredients List
Here’s what you’ll need to whip up these amazing milk cookies. Each ingredient plays a crucial role in creating that perfect, melt-in-your-mouth goodness. So, let’s gather everything before we dive in!
- 1 cup butter, softened – Make sure your butter is nice and soft for easy creaming!
- 1 cup sugar – This adds sweetness that balances perfectly with the rich butter.
- 1 cup brown sugar, packed – The molasses in brown sugar gives these cookies a lovely depth of flavor.
- 2 eggs – They help bind everything together and add moisture.
- 2 teaspoons vanilla extract – This is where the magic happens, bringing out all those delicious flavors.
- 3 cups all-purpose flour – The base of the cookies; it gives them structure and chewiness.
- 1 teaspoon baking soda – This helps the cookies rise and gives them that perfect texture.
- 1/2 teaspoon salt – Just a pinch to enhance the sweetness and balance everything out.
- 1 cup chocolate chips – Because what’s a milk cookie without pockets of melted chocolate?
That’s it! Simple, right? Now that we’ve got our ingredients ready, let’s get to the fun part—baking these delicious cookies!
How to Prepare Milk Cookies
Now that we have our ingredients all lined up, it’s time to dive into the baking process! Making these milk cookies is not only simple but also incredibly rewarding. You’ll want to follow these steps closely to ensure your cookies come out perfectly every time. Let’s get started!
Step-by-Step Instructions
- Preheat your oven: First things first, set your oven to 350°F (175°C). This step is crucial because you want your cookies to bake evenly right from the start.
- Cream the butter and sugars: In a large mixing bowl, cream together the softened butter, sugar, and brown sugar. Use a hand mixer or a sturdy wooden spoon. Mix until the mixture is light and fluffy—about 2-3 minutes. This aeration is key for that lovely texture!
- Add the eggs and vanilla: Crack in the eggs, one at a time, mixing well after each addition. Pour in the vanilla extract and give it another good mix. You want everything to be well-combined and smooth.
- Combine dry ingredients: In a separate bowl, whisk together the all-purpose flour, baking soda, and salt. This step helps to evenly distribute the leavening agent and salt throughout the flour.
- Mix dry and wet ingredients: Gradually add the dry ingredients to the wet mixture. Don’t dump it all in at once—this could lead to overmixing, which makes for tough cookies. Stir gently until just combined; it’s okay if there are a few flour streaks!
- Fold in the chocolate chips: Now, it’s time to add those delightful chocolate chips. Use a spatula to fold them into the dough gently, ensuring they’re evenly distributed without overmixing the batter.
- Drop the dough onto a baking sheet: Using a cookie scoop or tablespoons, drop spoonfuls of dough onto a lined baking sheet, leaving some space between each cookie to allow for spreading.
- Bake: Pop the baking sheet in the preheated oven. Bake for 10-12 minutes or until the edges are golden brown and the centers look slightly underbaked. They’ll continue to cook a bit as they cool, trust me!
- Cool: Let the cookies cool on the baking sheet for about 5 minutes before transferring them to a wire rack to cool completely. This step is essential, as it helps them set up nicely!
Tips for Success
To make sure your milk cookies turn out amazing every time, here are a few pro tips I’ve learned along the way:
- Use room temperature ingredients: Make sure your butter and eggs are at room temperature before starting. This helps create a smoother batter and better texture.
- Don’t skip the cooling step: Allowing cookies to cool on the baking sheet before transferring them is crucial for achieving that perfect chewy texture.
- Experiment with mix-ins: Feel free to add chopped nuts, dried fruits, or even different types of chocolate to customize your cookies! Just don’t overload them, or they might not hold together well.
- Keep an eye on baking time: Every oven is different, so check your cookies a minute or two early. You want them to look just set, not overbaked.
- Store correctly: These cookies stay fresh longer when stored in an airtight container. You can also freeze them for later enjoyment—just make sure to wrap them tightly!
With these steps and tips, you’ll be on your way to creating the most delightful milk cookies that everyone will love!
Nutritional Information Section
When it comes to treats like these delicious milk cookies, it’s always good to know what you’re enjoying! Here’s the estimated nutritional information per cookie. Keep in mind that these values can vary based on the specific ingredients you use and portion sizes, but they give you a solid idea of what to expect:
- Calories: 150
- Fat: 7g
- Saturated Fat: 4g
- Unsaturated Fat: 2g
- Trans Fat: 0g
- Cholesterol: 30mg
- Sodium: 100mg
- Carbohydrates: 20g
- Fiber: 1g
- Sugar: 10g
- Protein: 2g
These tasty cookies are a delightful treat, and knowing the nutritional info makes it even easier to enjoy them guilt-free! Whether you’re sharing with friends or sneaking a couple for yourself, it’s nice to have a little insight into what’s in each bite.
FAQ Section
Got questions about milk cookies? Don’t worry, I’ve got you covered! Here are some common queries I hear, along with my answers to help you out on your baking journey:
Q1: Can I use margarine instead of butter for these milk cookies?
While you can use margarine in a pinch, I really recommend sticking to real butter for the best flavor and texture. Butter gives milk cookies that rich, creamy taste that margarine just can’t match. Trust me, you’ll notice the difference!
Q2: How can I make my milk cookies chewier?
If you’re looking for that perfect chewy texture, try chilling your dough for at least 30 minutes before baking. This will help the cookies retain their shape and result in a delicious, chewy bite. Also, make sure not to overbake them; you want the centers to stay soft!
Q3: Can I add nuts or dried fruits to my milk cookies?
Absolutely! Adding nuts like walnuts or pecans can give your cookies a nice crunch, while dried fruits like cranberries or raisins add a lovely sweetness. Just be careful not to overload the dough—about ½ cup of mix-ins should do the trick!
Q4: What’s the best way to store leftover milk cookies?
To keep your cookies fresh, store them in an airtight container at room temperature. They’ll last for about a week. If you want to save some for later, you can freeze them! Just wrap them tightly in plastic wrap and pop them in a freezer bag. They’ll be just as delicious when you’re ready to enjoy them again!
Q5: Can I make these milk cookies gluten-free?
Yes, you can! Simply substitute the all-purpose flour with a 1-to-1 gluten-free flour blend. Make sure to check if the blend contains xanthan gum, as this helps with structure. The cookies may have a slightly different texture, but they’ll still be tasty!
Why You’ll Love This Recipe
- Quick and Easy: Whipping up these milk cookies takes just about 27 minutes from start to finish, making them a fantastic last-minute treat for any occasion.
- Deliciously Irresistible: With their buttery flavor and gooey chocolate chips, these cookies are an absolute crowd-pleaser that will have everyone coming back for seconds.
- Versatile for Any Occasion: Whether you’re hosting a birthday party, enjoying a cozy movie night, or just need a sweet pick-me-up, these cookies fit right in!
- Customizable: Feel free to mix in your favorite nuts or dried fruits for a fun twist—there’s no limit to the delicious combinations you can create!
- Perfect for Sharing: These cookies make a great gift! Package them up for friends, family, or neighbors and spread the love with homemade goodness.
Storage & Reheating Instructions
Once you’ve baked and enjoyed your delicious milk cookies, you might be wondering how to store the leftovers (if there are any!). Proper storage is key to keeping them fresh and tasty. Here’s how to do it right:
First, let your cookies cool completely on a wire rack. This step is super important because if you store them while they’re still warm, they can become soggy!
Once cooled, place your milk cookies in an airtight container. You can use a simple plastic container or a cute cookie jar—whatever you have on hand! Just make sure it seals tightly to keep the moisture in and the air out. These cookies will stay fresh for about a week at room temperature.
If you want to enjoy your milk cookies later, you can freeze them! Just wrap each cookie tightly in plastic wrap or place them in a freezer bag, making sure to squeeze out as much air as possible. They’ll keep in the freezer for up to three months. When you’re ready to enjoy them, let them thaw at room temperature or pop them in the microwave for about 10-15 seconds to warm them up. Just be careful not to overheat them; you want that gooey chocolate to be perfectly melty, not a hard lump!
With these storage and reheating tips, you can savor your milk cookies for days, or even weeks, and enjoy that homemade goodness anytime the craving strikes!
Variations
One of the best things about milk cookies is how easily you can mix things up! Whether you want to add some crunch, change the flavor, or just get creative, these variations will take your cookies to the next level. Here are some fun ideas to try:
- Nuts Galore: Toss in some chopped walnuts, pecans, or hazelnuts for a delightful crunch. They add texture and a nutty flavor that pairs beautifully with the chocolate chips!
- Different Chocolate Types: Switch things up by using dark chocolate chips, white chocolate chips, or even butterscotch chips. Each type brings its own unique flavor profile and sweetness level—experiment to find your favorite combination!
- Dried Fruits: Add some chopped dried cranberries, raisins, or apricots for a chewy surprise in each bite. They bring a touch of tartness that complements the sweetness of the cookies perfectly.
- Oatmeal Milk Cookies: For a heartier version, mix in some rolled oats—about a cup should do the trick. This will give your cookies a bit of chew and make them feel even more satisfying!
- Spiced Up: Want to add a little warmth? Sprinkle in some cinnamon, nutmeg, or even a dash of pumpkin spice for a cozy twist! This is perfect for the fall season or whenever you’re feeling festive.
- Peanut Butter Swirl: If you’re a peanut butter lover, try adding a swirl of creamy peanut butter into the dough before baking. Just be careful not to overmix; you want those delicious ribbons of peanut butter to shine!
These variations not only keep things exciting but also let you customize your milk cookies to suit any occasion or craving. So go ahead, get creative, and have fun baking your perfect batch!
Print
Milk Cookies: 7 Irresistibly Delicious Variations to Try
- Total Time: 27 minutes
- Yield: 24 cookies 1x
- Diet: Vegetarian
Description
Delicious milk cookies perfect for any occasion.
Ingredients
- 1 cup butter, softened
- 1 cup sugar
- 1 cup brown sugar, packed
- 2 eggs
- 2 teaspoons vanilla extract
- 3 cups all-purpose flour
- 1 teaspoon baking soda
- 1/2 teaspoon salt
- 1 cup chocolate chips
Instructions
- Preheat your oven to 350°F (175°C).
- In a large bowl, cream together the butter, sugar, and brown sugar.
- Add the eggs one at a time, mixing well after each.
- Stir in the vanilla extract.
- In another bowl, whisk together the flour, baking soda, and salt.
- Gradually add the dry ingredients to the wet mixture.
- Fold in the chocolate chips.
- Drop spoonfuls of dough onto a baking sheet.
- Bake for 10-12 minutes or until golden brown.
- Let cool before serving.
Notes
- Store cookies in an airtight container.
- These cookies can be frozen for later use.
- For a different flavor, add nuts or dried fruit.
- Prep Time: 15 minutes
- Cook Time: 12 minutes
- Category: Dessert
- Method: Baking
- Cuisine: American
Nutrition
- Serving Size: 1 cookie
- Calories: 150
- Sugar: 10g
- Sodium: 100mg
- Fat: 7g
- Saturated Fat: 4g
- Unsaturated Fat: 2g
- Trans Fat: 0g
- Carbohydrates: 20g
- Fiber: 1g
- Protein: 2g
- Cholesterol: 30mg
Keywords: milk cookies, chocolate chip cookies, dessert, baking