
There’s something utterly delightful about quick desserts, don’t you think? They’re like little rays of sunshine that brighten up a busy day! I absolutely adore single serve desserts because they satisfy my sweet tooth without leaving me with a mountain of leftovers. Sometimes, I just want a bite of something sweet, and this recipe is perfect for those moments when cravings strike. You know those evenings when you’ve had a long day and all you want to do is curl up with a cozy blanket and a little treat? That’s when I whip up this gorgeous dessert! It’s quick, easy, and best of all, it’s just for me! No need to share, unless I want to – which, let’s be honest, I sometimes do! Plus, the joy of baking something from scratch, even if it’s just for one, makes the whole experience feel special. So, let’s dive into this easy recipe that brings happiness in a single ramekin!
Ingredients List
Gathering the right ingredients is the first step to baking this delightful single serve dessert! Here’s what you’ll need:
- 1/4 cup all-purpose flour: This is the backbone of our dessert, giving it the structure we love. Make sure to level it off for accuracy!
- 1/4 cup sugar: Sweetness is key here! You can use granulated sugar, but feel free to experiment with brown sugar if you want a deeper flavor.
- 1/4 cup milk: Whole milk is my go-to for richness, but any milk will work. Almond or oat milk can be great dairy-free alternatives!
- 2 tablespoons butter, melted: Melted butter adds moisture and richness. Just pop it in the microwave for a few seconds, and you’re golden!
- 1/4 teaspoon vanilla extract: This little splash of flavor elevates your dessert to a whole new level. Don’t skip it!
- 1/4 teaspoon baking powder: This is our leavening agent, helping the dessert rise and become fluffy.
- Pinch of salt: Just a tiny bit of salt enhances all the other flavors and balances the sweetness.
With these simple yet essential ingredients, you’re all set to create something scrumptious! Let’s get baking!
How to Prepare Single Serve Desserts
Preheat the Oven
First things first, let’s get that oven preheated to 350°F (175°C). Preheating is super important because it ensures your dessert bakes evenly and gets that lovely golden color we all crave. I always preheat while I’m prepping my ingredients; it saves time and lets me dive right into baking once I’m ready!
Mix Dry Ingredients
In a small mixing bowl, combine the 1/4 cup all-purpose flour, 1/4 cup sugar, 1/4 teaspoon baking powder, and a pinch of salt. Use a whisk or fork to mix them well; you want everything to be evenly distributed. This little step helps avoid any clumps later on and makes sure the baking powder does its job properly. Trust me, it’s worth the extra minute!
Combine Wet Ingredients
Now, it’s time to bring in the wet ingredients! In the same bowl (less mess!), add in 1/4 cup milk, 2 tablespoons melted butter, and 1/4 teaspoon vanilla extract. Stir everything together until it’s well combined. You’re looking for a smooth batter that’s slightly thick but not too gloopy. If you see any flour streaks, just keep mixing gently until it’s all blended. It’s like magic watching it come together!
Prepare the Ramekin
Grab a small ramekin and grease it up! I like to use a bit of butter or cooking spray to ensure that delicious dessert slides right out when it’s done. Pour the batter into the prepared ramekin, filling it about halfway to give it room to rise. The anticipation is already building, right?
Baking Process
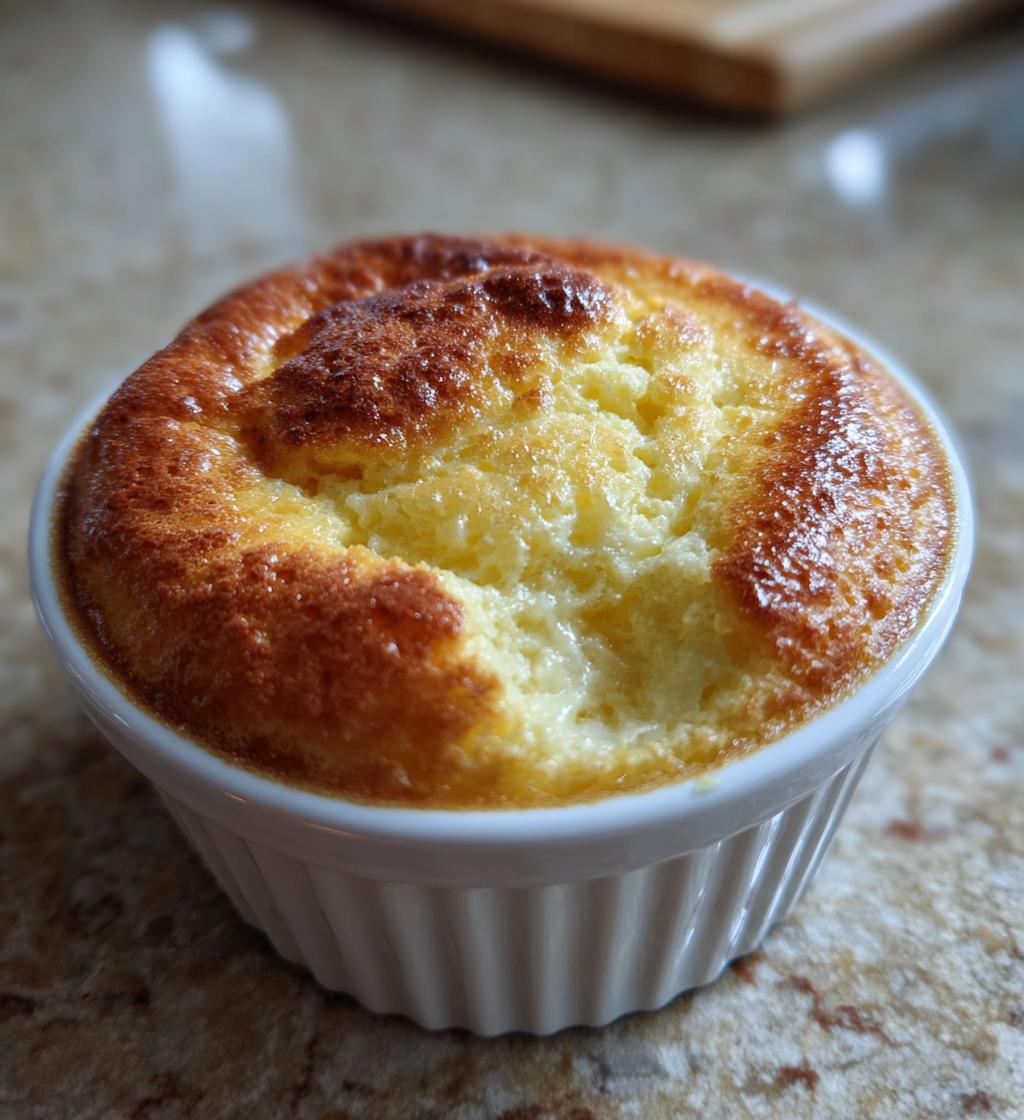
Pop that ramekin into your preheated oven and let it bake for 15-20 minutes. I usually set a timer for 15 first and then check it. Keep an eye on it; you’ll know it’s done when the top is golden brown and a toothpick inserted in the center comes out clean. No wet batter, just moist crumbs! This is when the sweet aroma starts wafting through the kitchen, and you can’t help but smile!
Cooling and Serving
Once baked, take it out of the oven and let it cool for a few minutes. This waiting game is tough, but it’s key for the flavors to settle! You can serve it warm right in the ramekin, or if you’re feeling fancy, slide it out onto a plate. Top it with a dollop of whipped cream or some fresh fruit for a little extra flair. Enjoy every bite of your single serve dessert, because you totally deserve this sweet treat!
Why You’ll Love This Recipe
This single serve dessert is a total game-changer! First off, it’s quick and easy – you can have a delicious treat ready in just 30 minutes. Seriously, who doesn’t love that? It’s perfect for those late-night cravings or when you just want a little something sweet without the fuss of a big batch. Plus, it’s made with simple ingredients you probably already have in your pantry!
Another reason I adore this recipe is its versatility. You can easily customize it by adding chocolate chips, nuts, or even a sprinkle of cinnamon if you’re feeling adventurous. And let’s not forget the joy of treating yourself to something special without the guilt of leftovers. This dessert is a satisfying, no-fuss way to indulge in a moment of sweetness, all tailored just for you. Trust me, once you try it, you’ll be hooked!
Tips for Success
To make sure your single serve dessert turns out perfectly every time, I’ve got some tried-and-true tips that I swear by!
Use Room Temperature Ingredients
First things first, let’s talk about temperature! For the best results, make sure your milk and melted butter are at room temperature. This helps create a smoother batter that mixes more evenly. If you forget to take them out ahead of time, no worries! Just pop the milk in the microwave for about 10-15 seconds to take the chill off.
Measure Carefully
Precision is key when baking, so measuring your ingredients accurately is crucial. I recommend using a kitchen scale if you have one, but measuring cups work just fine too. For those dry ingredients, like flour, spoon it into your measuring cup and level it off with a knife. If you pack it down or scoop it straight from the bag, you could end up with too much flour, and nobody wants a dense dessert!
Set a Timer
Timers are your best friend in the kitchen! I always set mine for the minimum baking time and then check for doneness. If you let it go too long, it can dry out quickly, and that’s a bummer. Remember, a toothpick inserted into the center should come out clean, but if it’s just a few moist crumbs, that’s perfect!
Don’t Overmix
When combining your wet and dry ingredients, mix until just combined. Overmixing can lead to a tougher texture, and we want our dessert to be soft and tender! It’s okay if there are a few flour streaks left; they’ll incorporate as the batter bakes.
Experiment with Toppings
Finally, have fun with toppings! A simple dollop of whipped cream is always delightful, but you can also add fresh berries, a sprinkle of nuts, or even a drizzle of chocolate sauce. Get creative and make it your own! These little touches can elevate your dessert from good to spectacular.
With these tips in hand, you’re ready to whip up the perfect single serve dessert. Happy baking!
Nutritional Information Section
Let’s talk about the nutritional goodness of this delightful single serve dessert! Each serving is packed with flavor while still being mindful of what goes into your treat. Here’s the estimated breakdown based on typical ingredients:
- Calories: 250
- Fat: 10g
- Saturated Fat: 6g
- Unsaturated Fat: 4g
- Trans Fat: 0g
- Cholesterol: 30mg
- Sodium: 150mg
- Carbohydrates: 35g
- Fiber: 1g
- Sugar: 20g
- Protein: 3g
Keep in mind, these values are estimates and can vary slightly based on the brands of ingredients you use. But hey, knowing what’s in your dessert is always a good thing! Enjoy your sweet treat, knowing it’s just for you and made with love!
FAQ Section
Got questions about single serve desserts? You’re not alone! Here are some common queries I hear, along with my helpful answers:
Can I make this dessert in the microwave?
Absolutely! If you’re short on time, you can microwave the batter in a microwave-safe mug for about 1-2 minutes. Just keep an eye on it, as microwaves can vary.
What are some fun variations I can try?
The beauty of single serve desserts is their versatility! You can add chocolate chips, nuts, or even a spoonful of peanut butter to the batter before baking. Feeling fruity? Toss in some fresh berries or banana slices for an extra twist!
How should I store leftovers?
If you happen to have leftovers (though I doubt it!), store them in an airtight container in the fridge for up to 2 days. Just reheat briefly in the microwave before enjoying again!
Can I substitute ingredients?
Definitely! If you’re out of milk, any non-dairy milk works great. You can also swap butter for coconut oil or even applesauce for a lighter option. Just keep the measurements the same, and you’re good to go!
Feel free to reach out if you have more questions or need suggestions. Happy baking!
Storage & Reheating Instructions
So, you’ve made this delicious single serve dessert, and now you have some leftovers (if that’s even possible!). Here’s how to store and reheat it to keep that delightful taste intact!
First, if you find yourself with any leftover dessert, let it cool completely. Once it’s at room temperature, transfer it to an airtight container. This will help maintain its moisture and flavor for up to 2 days in the refrigerator. If you want to keep it for a bit longer, you can freeze it! Just make sure to wrap it tightly in plastic wrap or foil, and pop it in a freezer-safe container. It’ll stay good for about a month.
When you’re ready to enjoy your dessert again, reheating is super easy! If it’s in the fridge, just take it out and let it sit for a few minutes before reheating. For the best results, pop it in the microwave for about 15-30 seconds – just enough to warm it through. If you’ve frozen it, I recommend letting it thaw in the fridge overnight before reheating.
Keep an eye on it while it’s warming up; you want it nice and cozy, not too hot! A sprinkle of fresh whipped cream or a scoop of ice cream on top can elevate your dessert experience even more. Enjoy every last bite, knowing you’ve made something special that keeps on giving!
Print
Single Serve Desserts: 7 Reasons You’ll Love This Treat
- Total Time: 30 minutes
- Yield: 1 serving 1x
- Diet: Vegetarian
Description
A delightful single serve dessert perfect for satisfying your sweet tooth.
Ingredients
- 1/4 cup all-purpose flour
- 1/4 cup sugar
- 1/4 cup milk
- 2 tablespoons butter, melted
- 1/4 teaspoon vanilla extract
- 1/4 teaspoon baking powder
- Pinch of salt
Instructions
- Preheat your oven to 350°F (175°C).
- In a small bowl, mix together flour, sugar, baking powder, and salt.
- Add milk, melted butter, and vanilla extract to the dry ingredients.
- Stir until well combined.
- Pour the mixture into a greased ramekin.
- Bake for 15-20 minutes, or until golden brown.
- Let it cool for a few minutes before serving.
Notes
- This recipe can be doubled for more servings.
- Top with whipped cream or fruit if desired.
- Store leftovers in the refrigerator for up to 2 days.
- Prep Time: 10 minutes
- Cook Time: 20 minutes
- Category: Dessert
- Method: Baking
- Cuisine: American
Nutrition
- Serving Size: 1 dessert
- Calories: 250
- Sugar: 20g
- Sodium: 150mg
- Fat: 10g
- Saturated Fat: 6g
- Unsaturated Fat: 4g
- Trans Fat: 0g
- Carbohydrates: 35g
- Fiber: 1g
- Protein: 3g
- Cholesterol: 30mg
Keywords: single serve desserts, easy dessert, quick dessert